Install a Dash Cam (Standard Instructions)
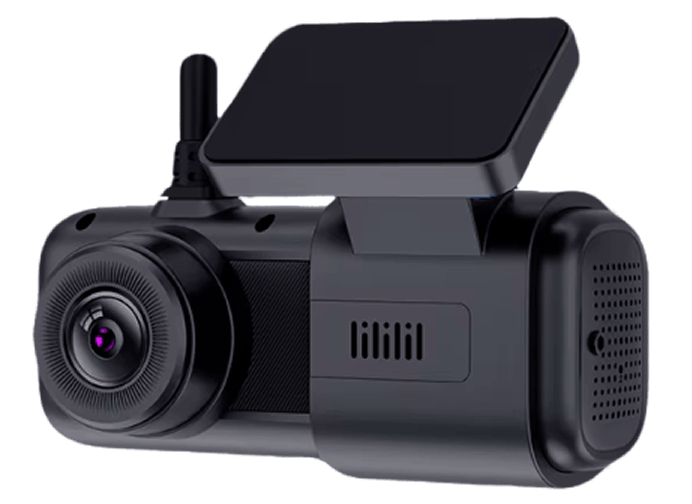
G2 Dash Cam Installation Guide

Required Tools & Materials
- G2 Dash Cam unit with adhesive mount
- Philips Screw driver
- Alcohol wipe
- Lint-free cloth
- Cable clips
- Multimeter
- Access to fuse box
- Vehicle keys
- Access to https://portal.abceld.com/
1. Remove Existing Equipment (If Applicable)
If your vehicle has a previously installed dash cam:
- Carefully detach it from the windshield.
- Remove any residual adhesive or clips.
- Unplug and safely store or discard the old cables.
2. Activate Your Dash Cam
Before mounting:
- 1. Visit https://portal.abceld.com/
- 2. Log in to your account.
- 3. Navigate to Devices in the left-hand menu.
- 4. Click the "Activate device" button in the top-right corner.
- 5. Enter the device serial number and assign it to a vehicle.
3. Identify Mounting Location
For Optimal Visibility & Performance:
- Mount below the rearview mirror, centered on the windshield.
- Place the device within the wiper sweep zone.
- Avoid:
- Blacked-out glass areas
- Dot matrix or shaded sections
- Areas that obstruct the driver’s view
- Leave enough clearance on both sides for screw driver access.
If using AI features:
- Follow AI Detection Best Practices and Dash Cam Position Recommendations provided by ABC PRO ELD for face and road detection accuracy.
4. Clean the Mounting Area
Windshield & Clip Surface Preparation:
- 1. Use the provided alcohol wipe to clean the windshield where you’ll mount the camera and route cables.
- 2. If more cleaning is needed, use a lint-free cloth with isopropyl alcohol (≥70%).
- 3. Let the area dry completely – no moisture, condensation, or alcohol residue should remain.
- 4. Use a clean, dry, lint-free cloth to ensure dryness.
Install only when temperature is above 50°F (10°C).
If colder, use windshield defroster or a heat gun to warm the area.
5. Mount the Dash Cam

- 1. Peel off the adhesive liner from the mount.
- 2. Position the camera and press firmly against the windshield
- 3. Hold in place for at least 30 seconds to allow proper bonding.
6. Route the Power Cable
- 1. Run the cable across the top of the windshield toward the A-pillar.
- 2. Secure the cable using provided clips or tuck it under the trim or windshield seal.
Ensure the cable:
- Doesn’t hang loosely
- Doesn’t interfere with airbags or sensors
7. Connect the Power Wires
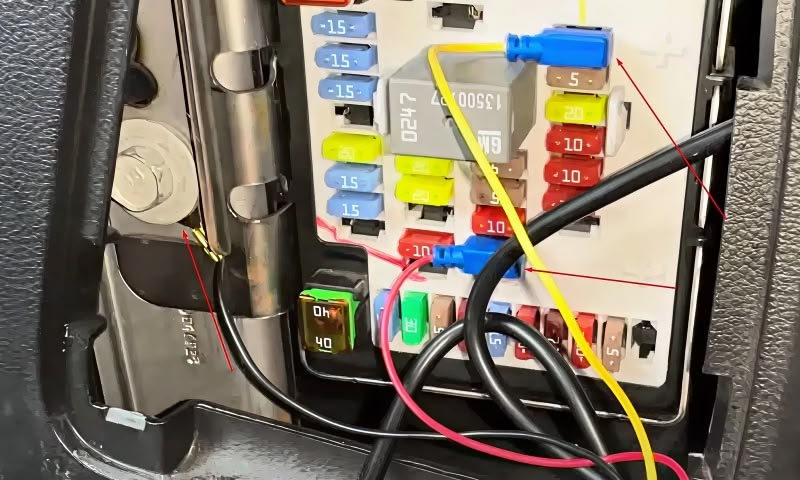
Locate the vehicle’s fuse box (usually in the footwell or under the dashboard).
Wire Connections (Use a multimeter to verify fuse voltages):
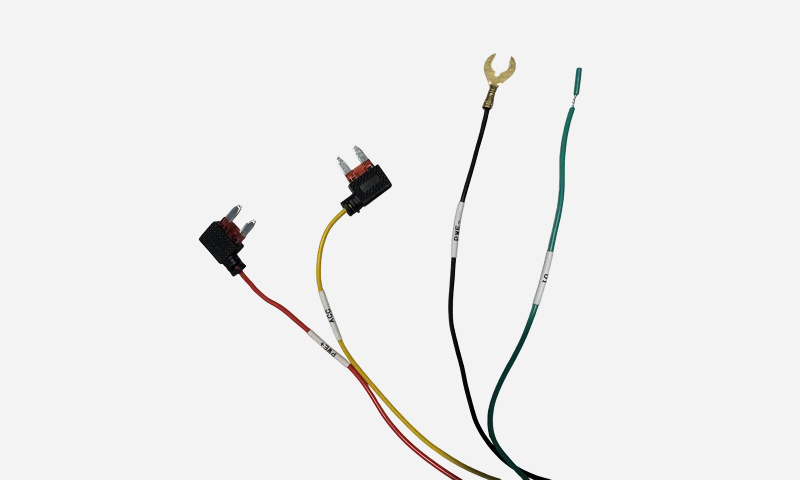
- Red Wire: This is for constant power (12V+). Connect it to a fuse that provides power at all times, even when the vehicle is turned off. This is usually referred to as a battery or always-on 12V source.
- Yellow Wire: This is the ACC (accessory/ignition) power wire. Connect it to a fuse that gets 12V only when the key is turned to the ACC or ON position. This allows the dash cam to detect when the vehicle is started.
- Black Wire: This is the ground wire. Connect it to a bare metal bolt or grounding point on the vehicle's chassis to complete the electrical circuit.
- Green Wire: This is the I/O data cable. Do not connect this wire unless you have a specific integration use case. It is not needed for standard dash cam installation.
Use fuse taps if available, and zip ties to secure wires safely.
8. Complete Installation & Power On
- 1. Double-check all connections.
- 2. Turn the vehicle ignition ON.
- 3. Confirm the dash cam powers up (LED indicators or screen).
9. Verify Installation Online
- 1. Go to https://portal.abceld.com/
- 2. Navigate to Devices > Camera
- 3. Confirm:
- Device status = Healthy
- Last communication = Recent
- 4. Go to Map > Select your vehicle
- 5. Click Refresh Snapshot to confirm:
- View is properly aligned
- Nothing is obstructing the lens